Loading and Overloading Information for RVs and Trailers
It is almost impossible to overload a passenger vehicle because space tends to limit the amount of weight you can carry. You can’t take your child’s six friends to the baseball game if you are taking all of the team’s Little League equipment in the back seat. Space, not weight, is the main concern.
Now that you have an RV, you must remember an RV is heavier than a passenger vehicle and is capable of being overloaded. Also, the storage capacity in most RVs offers any number of possibilities for improper weight distribution. The way you load your supplies can have a major impact on how the vehicle handles, as well as on the durability of your tires. The results of overloading can be serious. Passenger safety is at stake. Problems such as tire failure and/or poor handling can leave the driver with inadequate ability to control the vehicle during emergency maneuvers.
Load Ratings for RVs
RV manufacturers provide load ratings on certification tags at various points inside or outside the RV. The certification tags are usually placed as follows (if you can’t locate the sticker, check with your dealer):
- Motor homes: on door edge/pillar, or near the driver’s position in the interior.
- Pickup/Camper: on back exterior wall.
- Travel Trailers: on front left-side exterior wall.
- Tow Vehicles: on driver’s side door frame.
To weigh your RV, you will need to use a level, commercial platform scale to obtain the following five weights (refer to the yellow pages of your local telephone directory under “Scales-Public”):
- The entire vehicle with all wheels on the scale.
- The front axle with only the front wheels parked on the scale.
- The rear axle with only the rear wheels parked on the scale.
- The left side with only the left front and back wheels on the scale.
- The right side with only the right front and back wheels on the scale.
Springs, wheels, axles, and tires are all affected by overloading. Tire failure can be disastrous in an RV, especially at high speeds. Be very careful and pay close attention to the inflation pressures stamped on the sides of the tires.
Distribute weight as equally as possible on the left and right sides of your RV. The need for this will be clear when turning and maneuvering your RV in traffic.
Pickups with campers present another type of weight distribution problem because the camper is added to the truck as cargo, rather than being built on its own chassis or being towed. GVWR and GAWR listings still apply. Manufacturers are also required to tell you the weight distribution limits, or “center of gravity zones” which are listed in truck and camper owner’s manuals. The main focus in balancing a camper is to be sure the weight of the camper does not make the vehicle fishtail or top heavy and cause stability problems.
Loading a Motorcycle Trailer
The biggest problem with towing a motorcycle trailer is loading it so there is equal weight on each wheel. The less unused space in your trailer, the less load shifting problems you will have. If you carry an ice chest inside the trailer, be sure to pack it over the axle. If you carry the ice chest on the trailer tongue, load it at the same time you load the trailer to obtain the proper tongue weight. Remember to readjust the weight as you use the contents of the ice chest to maintain proper tongue weight. Loading your motorcycle saddle bags will also assist with traction and handling when towing a motorcycle trailer.
Pack frequently needed items last so they will be at the top of the trailer. Never overload the trailer beyond the GVWR.
Defensive Driving Techniques for All Drivers
Defensive driving requires all drivers to think ahead. This is even more important for RV drivers than for drivers of passenger vehicles. An RV driver must be continually aware of the traffic around the vehicle because directional changes are slower and the RV needs more space in traffic. Try to avoid roads during rush hour traffic. If you are driving in unfamiliar areas, ask someone (possibly one of your passengers) to help you with directions and always have a map of the area. If you are driving by yourself, always pull off the road at a safe place and stop the vehicle before looking at a map.
Be Prepared
Listen to the local radio stations where you are traveling. Be aware of traffic slow downs, collisions, or road construction, etc. If you are prepared and have a map, you will be able to take alternative routes.
Starting and Shifting
Always try to start and shift (for manual transmissions) smoothly to prevent wear and tear on the hitch and transmission systems.
Turning Patterns
Longer wheel bases make it necessary to change your turning patterns. You must turn wider at intersections or the rear wheel may roll over the curb. Go further into the intersection before starting the turn and adjust your lane position to increase the turning radius.
Curves in the highway can also be tricky. Stay to the center of the lane for right turns so the rear wheels will not go off the pavement. For a left turn or curve, stay to the right of the lane to prevent the back of the trailer from tracking into the oncoming lane of traffic.
RVs and some trailers have a high center of gravity, so turning corners and taking curves must be done at slower speeds to prevent swaying. Slow down before you enter the curve.
If you transport livestock, be careful because they can move around in a trailer. This shifts the center of gravity and makes a rollover more likely. With less than a full load of livestock, use barriers to keep the livestock together. Even then, be very careful in curves. Livestock will also lean in the curve and this could cause a rollover if you are driving too fast.
Winds
If you are driving in areas with strong winds, take special care. Crosswinds are the greatest threat because they can push a large motor home or a vehicle and trailer combination into another lane if you are not prepared. This is especially true for travel trailers. In most cases, going slower is the best defense against strong winds. If you are towing a trailer, you should gradually apply the trailer brakes to help control a swaying trailer. Headwinds require a heavier throttle to maintain usual speeds. You may be able to control an RV in strong winds, but the safest thing to do would be to pull over and wait it out. If you anticipate driving in very windy areas, call and obtain local weather and road conditions. Good sources of weather information are local airports, highway patrol, state police, or ranger stations. Often, you will see signs along the highway which show radio frequencies for weather information.
Snow
Always carry drive wheel and trailer wheel chains when you travel in snow country. Know how to put them on. Chains are needed for both the tow vehicle and for one axle of the trailer. If you have a motor home with dual-rear wheels, you will need chains for one tire on each side.
Ice
If you are towing a trailer on icy roads, go slowly, especially downhill. Use the lower gears. You may be able to gain additional traction for the tow vehicle by moderately releasing the tension of the load equalizing hitch. Always readjust the hitch after the icy road condition has passed because vehicle stability may be affected during normal driving conditions.
Mountain Roads
Will your vehicle make it up the grade? Almost all grades, regardless of severity, will cause you to slow down. Any grade steeper than six percent is considered extreme and requires special attention. The steeper the grade or the longer the grade and the heavier the load, the more you will have to use lower gears to climb hills or mountains.
When going down steep hills, gravity will tend to speed you up. You must select an appropriate safe speed, use a low gear, and apply enough braking power to hold you back without letting the brakes get too hot. Use the braking effect of the engine (lower gears) as the principal way of controlling your speed to save your brakes so you will be able to slow or stop as required by road and traffic conditions. Slow the vehicle and shift the transmission to a low gear before starting down a grade.
REMEMBER: The use of brakes on a long and/or steep downgrade is only a supplement to the braking effect of the engine. Once the vehicle is in the proper low gear, the following is a proper braking technique:
- Apply the brakes just hard enough to feel a definite slowdown.
- When your speed has been reduced to approximately five mph below your “safe” speed, release the brakes. This brake application should last for about three seconds.
- When your speed has increased to your “safe” speed, repeat steps 1 and 2.
Do not drive in the fast lanes on a multiple-lane grade. Stay in the far right lane while climbing a steep grade if your RV or trailer will not maintain the legal speed limit. It would be better to drop to a lower gear and slow down rather than pass slow trucks and tie up the faster lanes because you don’t have enough power.
Narrow Roads
Some two-lane roads have special “turn-out” areas. You may pull into these areas and allow vehicles behind you to pass. Some two-lane roads have a passing lane. Stay in the right lane so faster vehicles may pass you in the passing lane. When you drive a slow-moving vehicle on a two-lane highway or road where passing is unsafe, and five or more vehicles are following you, pull to the side of the road wherever you can safely do so to let the vehicles pass.
Try to stay to the right of the lane so the vehicles behind you can see ahead. Remember to pull off the road when it is safe and allow the faster vehicles to pass.
Escape Ramps
Escape ramps have been built on many steep mountain grades, and are used to stop runaway vehicles safely without injuring drivers and passengers. Escape ramps use a long bed of loose, soft material (pea gravel or sand) to slow a runaway vehicle, sometimes in combination with an upgrade.
Know where escape ramps are located on your route. Signs show drivers where ramps are located.
Road Signs
Pay attention to road signs that warn against travel by vehicles towing trailers. If you missed the sign that warned of a “Dead End” ahead, would you be able to turn your vehicle around? What was the weight limit for the bridge ahead? Did you notice the height clearance for the overpass? You may not notice these types of signs because you’ve never had to worry about them in your passenger vehicle. You will have to worry about them in your RV.
Freeway Driving
You will have slower acceleration when you enter a freeway, so you will need more space. Remember that freeway traffic has the right-of- way, so you must look for gaps large enough to accommodate your vehicle(s). You also need more space when passing other vehicles. Judging how much space you will need takes practice. If you don’t allow enough space and time to complete a pass, you may need to swerve quickly into another lane. This could result in a skidding, oversteering, swaying, or fishtailing trailer.
Following distances must also be increased because you cannot slow down and stop your vehicle quickly. When you want to exit a freeway, slow down sooner than you would for a smaller vehicle. Be aware that many off ramps have curves which continually tighten. You will need to stay to the outside of the curve so the rear wheels will not rub the curb or drop off the pavement.
By law (CVC §22406), vehicles towing trailers must stay in the right-hand traffic lane or as close as possible to the right edge or curb. If you drive on a divided highway with four or more traffic lanes in the same direction or where a specific lane or lanes have not been designated, you can drive in the lane just to the left of the right-hand traffic lane. When overtaking or passing another vehicle going in the same direction, you must use either: (1) the designated lane, (2) the lane just to the left of the right-hand lane, or (3) the right-hand traffic lane when use of that lane is permitted.
Dirt or unpaved Roads
Many times the only road into the campground is a dirt or gravel road. Consult a campground directory to see if a certain road is suitable for your vehicle. Pay close attention to the signs posted and believe them. If a sign prohibits trailers, don’t use that road. There may be a hazard such as rocks, low trees, or washed-out sections of the road ahead that only a four-wheel drive vehicle can handle safely.
Traveling on a Holiday
Proper planning can help reduce much of the holiday traffic congestion. Many campsites accept reservations. Since roads leading to many popular attractions will be crowded, you may want to plan on a different route. If you haven’t made reservations, it’s a good idea to stop early in the day to ensure you get a campsite, because private and public campgrounds fill up quickly. Get a good rest before traveling.
Fatigue
Driving is not as easy as it appears. Break up your driving time by taking a 15- to 30-minute rest every two-to-three hours. Get out of your vehicle and walk around. This will help to loosen tired muscles and rest tired eyes. Use this time to inspect your vehicle. It will also improve your alertness.
REMEMBER: Night driving can be especially hazardous since the body naturally wants to sleep at night. Most drivers are less alert at night, particularily after midnight. If you are sleepy, the only safe cure is to get off the road and get some sleep. If you don’t, you are risking your life and the lives of others.
Turning Patterns
Defensive driving requires all drivers to think ahead. This is even more important for RV drivers than for drivers of passenger vehicles. An RV driver must be continually aware of the traffic around the vehicle because directional changes are slower and the RV needs more space in traffic. Try to avoid roads during rush hour traffic. If you are driving in unfamiliar areas, ask someone (possibly one of your passengers) to help you with directions and always have a map of the area. If you are driving by yourself, always pull off the road at a safe place and stop the vehicle before looking at a map.
Be Prepared
Listen to the local radio stations where you are traveling. Be aware of traffic slow downs, collisions, or road construction, etc. If you are prepared and have a map, you will be able to take alternative routes.
Starting and Shifting
Always try to start and shift (for manual transmissions) smoothly to prevent wear and tear on the hitch and transmission systems.
Turning Patterns
Longer wheel bases make it necessary to change your turning patterns. You must turn wider at intersections or the rear wheel may roll over the curb. Go further into the intersection before starting the turn and adjust your lane position to increase the turning radius.
Curves in the highway can also be tricky. Stay to the center of the lane for right turns so the rear wheels will not go off the pavement. For a left turn or curve, stay to the right of the lane to prevent the back of the trailer from tracking into the oncoming lane of traffic.
RVs and some trailers have a high center of gravity, so turning corners and taking curves must be done at slower speeds to prevent swaying. Slow down before you enter the curve.
If you transport livestock, be careful because they can move around in a trailer. This shifts the center of gravity and makes a rollover more likely. With less than a full load of livestock, use barriers to keep the livestock together. Even then, be very careful in curves. Livestock will also lean in the curve and this could cause a rollover if you are driving too fast.
Winds
If you are driving in areas with strong winds, take special care. Crosswinds are the greatest threat because they can push a large motor home or a vehicle and trailer combination into another lane if you are not prepared. This is especially true for travel trailers. In most cases, going slower is the best defense against strong winds. If you are towing a trailer, you should gradually apply the trailer brakes to help control a swaying trailer. Headwinds require a heavier throttle to maintain usual speeds. You may be able to control an RV in strong winds, but the safest thing to do would be to pull over and wait it out. If you anticipate driving in very windy areas, call and obtain local weather and road conditions. Good sources of weather information are local airports, highway patrol, state police, or ranger stations. Often, you will see signs along the highway which show radio frequencies for weather information.
Snow
Always carry drive wheel and trailer wheel chains when you travel in snow country. Know how to put them on. Chains are needed for both the tow vehicle and for one axle of the trailer. If you have a motor home with dual-rear wheels, you will need chains for one tire on each side.
Ice
If you are towing a trailer on icy roads, go slowly, especially downhill. Use the lower gears. You may be able to gain additional traction for the tow vehicle by moderately releasing the tension of the load equalizing hitch. Always readjust the hitch after the icy road condition has passed because vehicle stability may be affected during normal driving conditions.
Mountain Roads
Will your vehicle make it up the grade? Almost all grades, regardless of severity, will cause you to slow down. Any grade steeper than six percent is considered extreme and requires special attention. The steeper the grade or the longer the grade and the heavier the load, the more you will have to use lower gears to climb hills or mountains.
When going down steep hills, gravity will tend to speed you up. You must select an appropriate safe speed, use a low gear, and apply enough braking power to hold you back without letting the brakes get too hot. Use the braking effect of the engine (lower gears) as the principal way of controlling your speed to save your brakes so you will be able to slow or stop as required by road and traffic conditions. Slow the vehicle and shift the transmission to a low gear before starting down a grade.
REMEMBER: The use of brakes on a long and/or steep downgrade is only a supplement to the braking effect of the engine. Once the vehicle is in the proper low gear, the following is a proper braking technique:
- Apply the brakes just hard enough to feel a definite slowdown.
- When your speed has been reduced to approximately five mph below your “safe” speed, release the brakes. This brake application should last for about three seconds.
- When your speed has increased to your “safe” speed, repeat steps 1 and 2.
Do not drive in the fast lanes on a multiple-lane grade. Stay in the far right lane while climbing a steep grade if your RV or trailer will not maintain the legal speed limit. It would be better to drop to a lower gear and slow down rather than pass slow trucks and tie up the faster lanes because you don’t have enough power.
Narrow Roads
Some two-lane roads have special “turn-out” areas. You may pull into these areas and allow vehicles behind you to pass. Some two-lane roads have a passing lane. Stay in the right lane so faster vehicles may pass you in the passing lane. When you drive a slow-moving vehicle on a two-lane highway or road where passing is unsafe, and five or more vehicles are following you, pull to the side of the road wherever you can safely do so to let the vehicles pass.
Try to stay to the right of the lane so the vehicles behind you can see ahead. Remember to pull off the road when it is safe and allow the faster vehicles to pass.
Escape Ramps
Escape ramps have been built on many steep mountain grades, and are used to stop runaway vehicles safely without injuring drivers and passengers. Escape ramps use a long bed of loose, soft material (pea gravel or sand) to slow a runaway vehicle, sometimes in combination with an upgrade.
Know where escape ramps are located on your route. Signs show drivers where ramps are located.
Road Signs
Pay attention to road signs that warn against travel by vehicles towing trailers. If you missed the sign that warned of a “Dead End” ahead, would you be able to turn your vehicle around? What was the weight limit for the bridge ahead? Did you notice the height clearance for the overpass? You may not notice these types of signs because you’ve never had to worry about them in your passenger vehicle. You will have to worry about them in your RV.
Freeway Driving
You will have slower acceleration when you enter a freeway, so you will need more space. Remember that freeway traffic has the right-of- way, so you must look for gaps large enough to accommodate your vehicle(s). You also need more space when passing other vehicles. Judging how much space you will need takes practice. If you don’t allow enough space and time to complete a pass, you may need to swerve quickly into another lane. This could result in a skidding, oversteering, swaying, or fishtailing trailer.
Following distances must also be increased because you cannot slow down and stop your vehicle quickly. When you want to exit a freeway, slow down sooner than you would for a smaller vehicle. Be aware that many off ramps have curves which continually tighten. You will need to stay to the outside of the curve so the rear wheels will not rub the curb or drop off the pavement.
By law (CVC §22406), vehicles towing trailers must stay in the right-hand traffic lane or as close as possible to the right edge or curb. If you drive on a divided highway with four or more traffic lanes in the same direction or where a specific lane or lanes have not been designated, you can drive in the lane just to the left of the right-hand traffic lane. When overtaking or passing another vehicle going in the same direction, you must use either: (1) the designated lane, (2) the lane just to the left of the right-hand lane, or (3) the right-hand traffic lane when use of that lane is permitted.
Dirt or unpaved Roads
Many times the only road into the campground is a dirt or gravel road. Consult a campground directory to see if a certain road is suitable for your vehicle. Pay close attention to the signs posted and believe them. If a sign prohibits trailers, don’t use that road. There may be a hazard such as rocks, low trees, or washed-out sections of the road ahead that only a four-wheel drive vehicle can handle safely.
Traveling on a Holiday
Proper planning can help reduce much of the holiday traffic congestion. Many campsites accept reservations. Since roads leading to many popular attractions will be crowded, you may want to plan on a different route. If you haven’t made reservations, it’s a good idea to stop early in the day to ensure you get a campsite, because private and public campgrounds fill up quickly. Get a good rest before traveling.
Fatigue
Driving is not as easy as it appears. Break up your driving time by taking a 15- to 30-minute rest every two-to-three hours. Get out of your vehicle and walk around. This will help to loosen tired muscles and rest tired eyes. Use this time to inspect your vehicle. It will also improve your alertness.
REMEMBER: Night driving can be especially hazardous since the body naturally wants to sleep at night. Most drivers are less alert at night, particularily after midnight. If you are sleepy, the only safe cure is to get off the road and get some sleep. If you don’t, you are risking your life and the lives of others.
Equipment and Operating Controls for All Drivers
Safe operation of your vehicle depends on your familiarity with the vehicle. Take the time to learn from the dealer or seller how each system works and study your owner’s manual.
Headlight use
You must turn on your headlights from a half hour after sunset to a half hour before sunrise or if snow, rain, fog, or other hazardous weather condition requires the continuous use of windshield wipers, or when visibility is not sufficient to clearly see a person or a vehicle for a distance of 1,000 feet.
No vehicle may be driven with only parking lights on. However, parking lights may be used as signals or when the headlamps are also lit.
Tires and Wheels
Tires on your vehicle must be of the proper size and correctly inflated for the load you are carrying. All tires on the vehicle should be of the same size, type, and construction. Check tire pressure when the tires are cold. Under-inflation reduces fuel economy and load carrying capacity. It may also cause control problems and can result in overheated tires and blowouts. Over-inflation increases tire wear, affects handling, and can also result in blowouts. Make sure dual tires do not touch.
Tire fires, which can be caused by running on a flat tire, are a danger on vehicles equipped with dual tires. Tire fires are very difficult to put out, so inspect your tires frequently.
Wheels must be compatible with tires and should be replaced if bent, heavily rusted, cause air leaks, or if wheel fasteners continually loosen. Improperly balanced wheel/tire combinations will cause excessive vibrations, tire wear, and possible damage to your vehicle.
Exhaust System
Exhaust gases are deadly because they contain carbon monoxide. Any time you suspect that exhaust fumes are entering the passenger compartment, determine the cause and have it corrected as soon as possible. Rear doors and rear windows should be closed tightly while driving to avoid drawing exhaust gases into the vehicle.
Mirrors
The most notable difference to first-time RV buyers or renters is the need to use side-mounted mirrors for rear vision. Backing an RV may also be a new experience. It may appear difficult, but a little practice will help you become competent when backing the RV, especially if you are towing a trailer. (See Trailer Backing)
Left- and right-hand outside mirrors are required on the towing vehicle if the RV or trailer obstructs the driver’s rear vision. Make sure the mirrors are large enough and that they are positioned for vision at least 200 feet to the rear of the vehicle. You need the mirrors to do more than back the vehicle. Check your mirrors frequently for traffic conditions behind you so you can avoid last minute maneuvers and surprises. Side mirrors should be as large as practical, with a separate convex mirror mounted below. Mount the mirrors as wide apart as possible for maximum rear vision and easy backing. Trailer towing mirrors should be adjusted so that the inside edge of the mirror is further out than the outside edge of the trailer. The RV or trailer’s rear wheels should be visible in the convex mirrors to check for correct tracking. (See Turning Patterns)
Use your mirrors to get a good idea of the size of your vehicle. Larger vehicles need more space to turn without running over curbs or sideswiping stationary objects. You can gain valuable experience by practicing on a residential street or in an empty parking lot.
Rear-Looking TV Systems
Some housecars and motorhomes are equipped with rear-looking closed circuit television systems to help you back your vehicle. The closed circuit TV system should be used in conjunction with your mirrors. The more you practice using the closed circuit TV system for backing your vehicle, the more proficient you will be.
Trailer Backing
Perform a safety inspection before each trip. Make sure that:
- The pin securing the ball mount to the receiver is intact.
- The hitch coupler is secured.
- Spring bar hinges are tight with the safety clips in place (load equalizer or weight distributing hitches).
- Safety chains are properly attached.
- The electrical plug is properly installed.
People who tow trailers share the same safety concerns as other RV drivers. However, a tow vehicle and a trailer form an articulated (hinged) vehicle which presents an additional set of concerns. The weight considerations described on pages 30 and 31 are very important to safe towing. The tow vehicle must be a proper match for the trailer. If the trailer is properly equipped, it can perform safely under a variety of driving conditions. The tow vehicle should also have enough power to climb mountain grades without excessive loss of speed. There are three basic types of trailers which mostly differ in the way they are hitched:
- Conventional travel trailers, including folding camping trailers.
- Fifth-wheel trailers.
- Motorcycle, tent, and cargo trailers.
Conventional Trailers
The ball and coupler hitch is used on a wide variety of tow vehicle and trailer combinations. This hitch consists simply of a ball attached to the rear of the tow vehicle and a coupler (socket) at the tip of a tongue or A-frame attached to the front of the trailer. This hitch is commonly used on recreational trailers.
A load-distributing hitch is used for heavier models such as utility trailers, boat trailers, and travel trailers. (See the Balance and Hitch Adjustment sections below) These load-distributing hitches use special equipment to distribute the tongue load to all axles of the tow vehicle and trailer to help stabilize the tow vehicle. Here are some terms you should know when discussing hitch adjustment and in evaluating hitch performance:
- Receiver: Hitch platform fitted to the tow vehicle.
- Ball Mount: A removable steel component that fits into the receiver. The hitch ball and spring bars (only on load- distributing hitches) are attached to it.
- Sway Control: A device designed to lessen the pivoting motion between the tow vehicle and trailer when a ball-type hitch is used.
- Coupler: The ball socket at the front of the trailer A-frame that receives the hitch ball.
- Spring Bars: Load-leveling bars used to distribute hitch weight among all axles of the tow vehicle and the trailer in a load-distributing ball-type hitch.
Fifth-wheel Trailers
Not as much attention is given to balance, hitching procedures, and weight restrictions for fifth-wheel trailers because they are basically very stable. A disadvantage that a fifth-wheel has over conventional trailers is that much of the truck bed space is not available. The fifth- wheel hitch occupies the center of the truck bed and the hitch pin is in front of the center line of the tow vehicle’s rear axle. The hitch weight of fifth-wheel trailers is usually around 20 percent of the trailer weight. Hitches are rated for up to 15,000 pounds of gross trailer weight. Here are some terms used to describe typical fifth-wheel hitch components:
- Fifth-wheel Plate: Unit that contains the hitch plate, plate jaws, and a handle mounted in the truck bed.
- Handle: Device used to release or lock the plate jaws.
- Hitch Plate: “Wheel” that allows the trailer to rotate.
- Pin: The connecting device attached to a fifth-wheel trailer and designed to fit into the plate jaws mounted in the truck bed.
- Pin Box: Structure attached to the bottom front section of the trailer frame (the pin is attached to the bottom).
- Plate Jaws: Holds the pin.
- Side Rails: Support rails which are bolted to the tow truck bed to support the fifth-wheel hitch.
Motorcycle, Tent, and Cargo Trailers
There are several types of couplings between the towing vehicle and the trailer, which are:
- Ball and socket.
- Ball type with a swivel.
- Universal-joint type with a detachable pin.
- Pin and swivel type.
The coupling you choose should be:
- Non-slip, non-loosening, and non-binding.
- Easy to hook and unhook.
- Free moving.
Motorcycle riders towing a trailer must remember to ride closer to the center of the road. You have the width of your trailer to worry about. Be careful of the “oil strip” in the center of the road at intersections. Also, watch for uneven road surfaces and road edges which can unbalance the trailer.
Transporting Passengers
Here are the rules for transporting people in RVs or recreation trailers:
- People are not allowed in a trailer coach while it is being towed (CVC §21712(d)).
- People are allowed in a fifth-wheel trailer coach while it is being towed (CVC §21712 (f), (i)).
- A camper with people in it must have an unblocked exit door which can always be opened from both the inside and outside (CVC §23129).
Weighing a Trailer
You can find a public scale by looking under “Public Scales” in the yellow pages of your local telephone directory.
Trailers must be carefully weighed to make sure that loads are properly distributed, front to rear as well as left to right. There are two additional considerations with trailer weights:
- The tow vehicle pulling the trailer.
- The hitching system that connects the two.
Both the tow vehicle and the hitching system have weight capacities which affect the safe handling of the vehicle. As a new RV owner or driver you should be aware of this.
- Tow Vehicle – do not exceed the GVWR of the tow vehicle. This includes the curb weight of the vehicle, payload, and hitch weight. Hitch weight is the percentage of the trailer weight that is placed on the trailer coupler of the tow vehicle. (Refer to the next section on Trailer Vehicle Hitch Weight.) Tow vehicles also have gross axle weight rating (GAWR) limits. The payload and hitch weight must be divided evenly between the axles to conform to the maximum weight limits and to avoid oversteering problems.
- Trailer Vehicle Hitch Weight – approximately 10-15 percent of a trailer’s gross weight is designed to be loaded in front of the front axle and onto the hitching mechanism. This ensures the stability needed for road handling. If your trailer is not stable, you may have a problem with not enough weight on the hitch. Here is a method to figure out the hitch weight:
- Park your loaded trailer on a scale so that the hitch coupler extends beyond the end of the scale, but the tongue jack post (the post on the front of the trailer which rests on the ground when unhitched) is on the scale.
- Block the trailer vehicle wheels, unhitch the tow vehicle, and obtain a weight rating. This is the curb weight of the trailer vehicle alone.
- Place a jack stand or 4″ x 4″ blocks under the coupler and beyond the scale so that the tongue jack post is supported off the scale and the trailer is fairly level. Note this weight rating.
- Subtract the reading in #2 from the reading in #3 for the hitch weight. In any RV, vehicle stability and safety can be affected by weight distribution. For example, if the rear axle weight is low, it is best to load the heaviest supplies toward the rear. Keep the heaviest supplies at the bottom of the RV, to keep the center of gravity low and ensure the best handling.
Balance
Before you tow a trailer, evaluate the trailer’s weight distribution. Hitch weights for travel trailers should typically be at least 10 percent of the trailer’s gross weight for acceptable handling. In some cases it can go to 15 percent or higher. Hitch weight for larger trailers is limited by the capacities of the tow vehicles and hitches. The strongest load- distributing hitch is rated for a maximum hitch weight of 1200 pounds. Most passenger car suspensions cannot handle that much weight and the trailer should be towed with a pickup truck or van. Improper weight distribution can cause the trailer to fishtail (sway back-and-forth across the lane).
Hitch Adjustment
If the hitch weight is less than 10 percent of the gross trailer weight, you can compensate for some of this by loading heavy supplies such as tools and canned goods as far forward as possible. If your trailer’s water tank is behind the axle(s), travel with as little water in the tank as possible to reduce weight in the rear. Trailers with water tanks located in front usually handle best when the tanks are full, because the water adds to the hitch weight.
Be sure that the spring bars of the load-distributing hitch are rated high enough to handle the hitch weight of your trailer, plus a safety margin of at least 10 percent. Check for adequate rear suspension of the tow vehicle. This means that the vehicle sits relatively level prior to hitching the trailer.
Load-distributing hitches are designed to distribute the hitch weight relatively evenly to all axles of the tow vehicle and trailer. The tow vehicle and trailer should be in a level position (altitude) in order for the hitch to do its job properly. Here is how to check:
- With the tow vehicle loaded for a trip, measure the distance between the vehicle and the ground at reference points, which you can establish, in front and rear. Keep the figures handy for later use.
- Hitch the trailer and adjust the tension on the spring bars so the tow vehicle remains at roughly the same attitude (i.e., if the rear drops an inch after hitching, the front should also drop an inch).
- Inspect the trailer to be sure it is level. If it is not level, the hitch ball height should be raised or lowered, as necessary. You may need spring bars rated for more weight if you cannot keep the tow vehicle from sagging in the rear.
Safety chains are required for travel trailers. Safety chains are not required for fifth-wheel trailers. The purpose of safety chains is to prevent the trailer from separating from the tow vehicle in event of a hitch failure, such as a hitch ball that has loosened. The chains should be crossed in an “X” fashion below the ball mount, with enough slack to allow unrestricted turning, but not enough to allow the coupler to hit the ground.
Breakaway switches are also required for any trailer having a gross weight of 1500 pounds or more and manufactured after December 31, 1955. They are designed to activate trailer brakes if the tow vehicle becomes separated from the trailer. One end of the breakaway switch is attached to an electrical switch on the trailer frame and the other end is looped around a stationary hitch component on the tow vehicle. If the two vehicles become separated, the cable pulls a pin inside the breakaway switch and applies full power from the trailer battery to the trailer brakes.
Even though hitch component failure is rare, the breakaway switch and the safety chains must be in good working order.
The hitch on the motorcycle trailer should be on the same plane as the rear axle on the motorcycle or slightly below. This will help prevent the trailer from pushing up on the rear end when braking. Also, the hitch should be as close to the rear tire as possible to provide a more solid support without interfering with the tire. Anchor the hitch so that two mounts are on each side. One of the two mounts on either side should resist a downward force and one of the two mounts on the other side should resist the rearward pull.
The tongue length on the trailer is generally twice the trailer wheel width but no more than six feet from the axle to the end of the tongue. Good design will allow for good sway control. If the tongue is too short, the trailer will sway. If too long, the trailer will be sluggish and cut corners when turning.
For motorcycle trailers, you should use a trailer designed for motorcycles because auto trailer tongue weights are too heavy. A trailer with a good aerodynamic design will enhance handling and performance. Maintaining a low center of gravity will improve handling as well.
Sway Control
The trailer should handle well if the weight and hitch adjustments are correct. However, the coupling between a tow vehicle and trailer should also prevent side-to-side motion for the best possible towing comfort and safety. If you detect sway in your trailer, stop to check if the load has shifted. Check for suspension problems and make sure the tires and wheels are secure and inflated properly. Be sure the trailer hitch is secure. A small reduction in tire air pressure or a slight increase in the tongue weight may help. A sway control device should be included when the hitch is installed. This device helps give the tow vehicle and trailer a “one-vehicle” feel. There are two basic types of sway control systems available:
- Friction bar – slides in and out and is activated by the motion of the vehicles. When you brake or turn, the trailer weight compresses the bar which then compresses the trailer against the tow vehicle.
- Dual cam sway control – usually works better for large trailers with heavy tongue weights. The cam action is applied to the spring of the trailer to reduce sway and shifts the weight forward. It also adjusts a weight shift which allows the trailer to follow the tow vehicle.
Trailer Lights
Trailers in California are required to have reflectors, tail, brake, and license plate lights. Signal lights are also required if the tow vehicle’s lights are hidden. Trailers over 80 inches wide must have clearance lights. Most manufacturers comply with these requirements; however, it is up to you to be sure that all lights operate correctly.
Trailer Brakes
In California, brakes are required on any trailer coach or camp trailer having a gross weight of 1500 lbs. or more. Usually the braking capacity on tow vehicles is good; however, it may not be good enough to safely stop the several hundred to several thousand additional pounds that your trailer weighs. Most conventional and fifth-wheel trailers have electric brakes, activated by a controller in the tow vehicle. The controller automatically coordinates the tow vehicle and trailer braking so the two systems work together when the brake pedal is applied.
The controller can also be helpful in stabilizing a trailer that sways because of bad road conditions. Manually applying the trailer brakes by using the hand lever on the controller will stabilize a trailer that is likely to sway.
Folding camp trailers and boat trailers are usually fitted with surge brake systems which operate separately from the tow vehicle’s brakes.
Surge brakes are applied by a mechanism attached to the receiver/ball connection. As the tow vehicle slows, the forward motion of the trailer compresses the mechanism which in turn applies the trailer brakes.
Motorcycle trailers do not need brakes unless the weight exceeds 1500 pounds gross. If you install brakes on your motorcycle trailer, be sure the brakes do not brake harder than the motorcycle or the motorcycle may flip backwards over the trailer when the brakes are applied. The brakes must always be properly adjusted.
Trailer Backing
Backing a trailer can be frustrating for inexperienced owners. The most important thing to remember is that the trailer will go in the opposite direction of the tow vehicle. It is helpful to have another person help you back the trailer.
Here are two methods for backing trailers:
- Turn the vehicle’s wheels to the right to make the trailer go left, and vice versa.
- Put your hand at the bottom of the steering wheel. The trailer will go in the same direction your hand moves (moving your hand to the right will cause the trailer to go right, and vice versa).
Sharp steering wheel corrections will cause the trailer to jackknife and may cause damage to the rear of the tow vehicle or the front of the trailer.
Conclusion
This booklet gives you some important information about RV and trailer safety. A good understanding of RV and trailer safety and lots of driving practice will help you operate your vehicle with greater confidence and enjoyment.
Be safe and enjoy your travels.
Recreational Trailer Endorsement
A driver must have a fifth-wheel recreational trailer endorsement added to his/her Class C driver license to pull a fifth-wheel recreational trailer over 10,000 lbs., but not over 15,000 lbs. GVWR, which is not used for hire. This endorsement is not required if the driver has a commercial or noncommercial Class A driver license.
To obtain an original fifth-wheel recreational trailer endorsement-
Adults must:
- Complete an application for a driver license (DL 44).
- There is no fee unless your license expires within six months.
- Pass the Recreational Vehicles and Noncommercial Class A Trailers law test.
- Pass the basic Class C law test, unless you renewed your Class C license within the last 12 months.
- Pass a vision test.
- You are not required to submit a Health Questionnaire or Physician’s Health Report.
- You are not required to take a pre-trip, skills, or driving test to add a Recreational Trailer endorsement to your current license.
Minors must:
- Complete the items listed above.
- Meet the additional requirements listed in the California Driver Handbook in the Provisional License section.
Driving Test Sites
Call 1-800-777-0133 to make an appointment for your noncommercial Class A or Class B driving test at any of the following offices:
Arleta
Bakersfield
Bishop
Capitola
Compton
El Centro
Escondido CLD Driving Test Center
Eureka
Fremont
Fresno
Fullerton
Lancaster
Modesto
Montebello
Oakland-Coliseum
Rancho San Diego
Redding
Salinas
San Bernardino CDL Driving Test Center
San Luis Obispo
Santa Barbara
Santa Rosa
Santa Teresa
Stockton
Torrance
Ukiah
Vallejo
Ventura
Visalia
West Sacramento CDL Driving Test Center
Yuba City
Types of RVs
There are several types of RVs and trailers which offer living accommodations in a mobile setting. The following types of vehicles may be operated with the license classes described in the License Classes and Requirements chart on pages 2 and 3.
| Type of Vehicle | Explanation |
|---|---|
Type of Vehicle
|
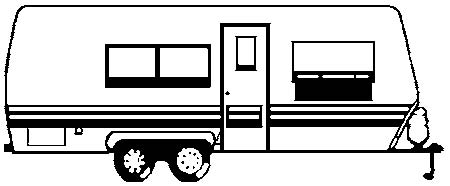
Explanation Conventional-these vary in size from 13 to 35 feet. Most can be towed with a small size vehicle. A larger model may require a heavier pickup or van as the towing vehicle. |
Type of Vehicle

|
Explanation Fifth-wheel-is coupled to the towing vehicle (usually a pickup truck) with a hitch centered over the vehicle’s rear axle. Fifth-wheels vary in length from 17 to 40 feet. |
Type of Vehicle

|
Explanation Folding Camping Trailer-has collapsible sides that are folded down for compact travel and unfolded at a campsite. Most can be towed by an average size vehicle. |
Type of Vehicle
|
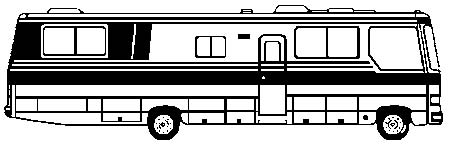
Explanation Motor home-divided into two types. The larger one is built on a truck chassis with a gasoline or diesel engine and is capable of traveling long distances due to a large fuel capacity. The smaller or mini-motor home is built on a modified van chassis and usually has a section that overhangs the cab. |
Type of Vehicle

|
Explanation Van Camper and Conversion-van camper is equipped with most of the amenities found in motor homes, but bed size and space to maneuver are limited. Vehicles usually have a raised roof for additional headroom. A van conversion normally has a bed, dinette, sink, and a small water supply but is not as fully equipped for camping as a van camper. |
Type of Vehicle

|
Explanation Truck Camper-a detachable section designed to be transported on a pickup truck. The larger varieties may require trucks with dual-rear wheels. Also called pickup camper or cab over camper. |
Noncommercial Class B (45′ Housecar) Requirements
To obtain an original noncommercial Class B license – Adults must:
- Complete an application for a driver’s license (DL 44).
- Pay the application fee.
- Submit a Physician’s Health Report (DL 546A) (PDF) signed by your physician dated not more than two years prior to the date of your application.
- Pass the basic Class C law test, unless you renewed your Class C license within the past 12 months.
- Pass the Driver’s Examination for 45′ Housecars law test.
- Pass a vision test.
- Perform a vehicle safety check.
- Pass a skills test.
- Pass a driving test.
Minors must:
- Complete the items listed above.
- Meet the additional requirements listed in the California Driver’s Handbook in the Provisional License section.
Examinations:
- Driver’s Examination for 45′ Housecars law test. You must pass the law test based on the information contained in this booklet. The test may be taken at any DMV field office. You may make an appointment online at www.dmv.ca.gov, or by calling 1-800-777-0133.
- Vehicle safety check. Before the skills test, you must demonstrate that the turn signals, brake lights, horn, emergency flashers, and brake system are working. This is not part of your pre-trip test. However, if any of these items are not working properly or are missing; your driving test will be postponed.
- Skills tests. Skills tests are designed to demonstrate your skill in stopping, backing in a straight line, completing a right turn around a cone or marker, and backing into a camping space.
- Driving test. The driving test includes entering and exiting a freeway, freeway driving with lane changes, right and left turns into one-way and two-way traffic, railroad crossings, driving on a grade or steep hill, etc. You may make an appointment by calling 1-800-777-0133. Online appointments are not available for this type of driving test.
- Physician’s Health Report. A Physician’s Health Report (DL 546A) (PDF) form signed by your physician is required and must be given to DMV for review and approval before your license is issued and then every two years after that. The Health Report expires two years from the examination date. Failure to maintain a valid Health Report form with DMV will mean that your license is valid only for Class C and, if endorsed, for Class M1 or M2 vehicles. Health Report forms are available online at www.dmv.ca.gov.
45′ Housecar Endorsement Exemptions
The following license classes are exempt from the 45′ housecar endorsement requirement:
- Commercial Classes A and B
- Noncommercial Class A
45′ Housecar with Air Brakes
You are not required to pass an air brake law test or to perform an air brake system check if your housecar is equipped with air brakes. You will be asked to perform a Vehicle Safety Check by the DMV examiner.
45′ Housecar Endorsement Refusal
If you cannot pass the 45′ housecar driving test because of lack of skill, you will be denied the 45′ housecar endorsement. You may request a hearing if you are denied this endorsement. Ask the DMV employee to send a request to the Driver Safety Actions unit in Sacramento. You will then be sent a letter advising you of your hearing rights.
Pre-Trip Inspection for Noncommercial Class A License
The items to look for on your vehicle during your pre-trip inspection are listed below. Visually check for and describe how you would check:
- Lights: All lights (e.g., high and low beam headlights, turn signals, clearance, identification) must be clean and working.
- Windshields: The windshield must be clear and undamaged.
- Mirrors: The mirrors must be secure, properly adjusted, and clean.
- Rims: The rims cannot be damaged or bent. There should be no welding repairs or rust trails to indicate a rim is loose on the wheel.
- Tires: Each tire at every axle must be properly inflated, have evenly worn tread, and have no cuts or other damage.
- Lug nuts: All lug nuts must be present, not loose, and have no cracks radiating from lug bolt holes.
- Brake linings: The linings (where visible) must not be dangerously thin. Check brake drums and linings for oil, grease, etc.
- Oil level, coolant level, and power steering fluids: All must be in the safe operating range.
- Belts: There should be no cracks.
- Hoses: Should not be worn or leaking.
-
Fifth-wheel assembly:
- Mounting bolts: Cannot be loose or missing.
- Safety latch: Must be engaged, if equipped.
- Locking jaws: Must be locked around the trailer kingpin.
- Platform supporting the skid plate: Cannot be cracked or broken.
- Release arm: Must be in the engaged position and locked in place.
- Kingpin: Where visible, cannot be bent.
- Apron: Where visible, cannot be bent, cracked, or broken.
- No gap between the trailer and the skid plate.
- Sliding fifth-wheel: If equipped, has no loose or missing parts in the mechanism, the locking pins are engaged, and the fifth-wheel is positioned properly so the towing vehicle clears the landing gear.
-
Other coupling systems:
- Pin/Ball/Coupler: Must be seated properly in the coupler and locked.
- Equalizing arms: If equipped, must be attached and the chains must be tight.
- Safety chains: Must be in an “X” pattern.
- Breakaway switch: If equipped, must be connected to the first link of the safety chain.
- Air connections: If equipped, must be in good condition and not leaking.
- Electrical connections: Must be seated and locked in place.
- Landing gear: If equipped, must be fully raised and have no missing parts. The handle must be secure and the support frame and landing pads cannot be damaged. Check for air or hydraulic leaks if power operated.
- Frame of trailer: Must have no cracks or bends in longitudinal frame members or cross members.
- Doors and hinges: Must not be damaged and must open and close properly.
- Ties: If equipped with ties, straps, or binders they must be secured.
- Emergency equipment: Identify the location of three red reflective triangles and of the properly charged and rated fire extinguisher.
- Hydraulic brakes: Check them by pumping the brake pedal three times and then applying steady pressure for five seconds. The pedal should not move.
-
Air brake system, if equipped – Demonstrate the following:
- Air governor cut-out: with the engine running and the air gauge rising, demonstrate that the air pressure gauge will not rise above 130 pounds per square inch (psi) by allowing the gauge to rise to its maximum pressure.
- Air governor cut-in: with the engine running and the air gauge static, demonstrate that the governor will cut-in no lower than 85 psi by depleting the air supply (pumping the brake pedal) to the point that the gauge will begin rising.
- Air leakage: when the air pressure is in the compressor’s operating range (85-130 psi), shut off the engine and release all air-operated parking brakes. Press down on the brake pedal and when the gauge stabilizes, begin timing for one minute. A single vehicle should not lose more than 3 psi and a combination vehicle should not lose more than 4 psi from the stabilized air pressure reading in that minute.
- Low air warning device: deplete the air supply by pumping the brake pedal and check that the low-air warning light, buzzer, or both engages between 55-75 psi.